SmartPFMPersonal Finance Manager
Quick-start guides

Set up SmartPFM in an evening – one module at a time

Start with the quick setup, then open the guide for each module when you get to it. Each guide has the steps and a worked example. Inside the app, every screen has a Help link and every important field a ?.

Video tutorials

Watch it done, step by step

Short videos on a demo account – the figures are examples. They open on YouTube. Watch the whole playlist.

SMARTPFM TUTORIAL 1 – Introduction to SmartPFM Personal Finance Manager

SMARTPFM TUTORIAL 1 – Introduction to SmartPFM Personal Finance Manager

In this first tutorial we introduce SmartPFM Personal Finance Manager, visit smartpfm.com, create and confirm an account, sign in safely and tour the app's menu.

Watch · 12:07 min
SMARTPFM TUTORIAL 2 – Monthly Budget Management: Income and Expense Settings

SMARTPFM TUTORIAL 2 – Monthly Budget Management: Income and Expense Settings

How the SmartPFM monthly budget works, and how to enter salary, rent, utilities, school fees and insurance once so every month builds itself.

Watch · 12:33 min
SMARTPFM TUTORIAL 3 – Net Worth Management – Assets and Liabilities

SMARTPFM TUTORIAL 3 – Net Worth Management – Assets and Liabilities

Add what you own and what you owe: SACCO, money market fund, chama, listed shares, pension, land, your home and a SACCO loan.

Watch · 12:29 min
SMARTPFM TUTORIAL 4 · PART I – Linking Your Budget to Your Net Worth – Loans and Savings

SMARTPFM TUTORIAL 4 · PART I – Linking Your Budget to Your Net Worth – Loans and Savings

Enter each event once: link a SACCO loan repayment (at the budget or deducted at source) and savings contributions to your MMF, SACCO, pension and chama.

Watch · 10:19 min
SMARTPFM TUTORIAL 4 · PART II – Linking Your Budget to Your Net Worth – Assets

SMARTPFM TUTORIAL 4 · PART II – Linking Your Budget to Your Net Worth – Assets

Add a bond whose coupons arrive in your budget, then buy land (in instalments) and shares through your budget and add to a holding with Buy more.

Watch · 9:11 min
SMARTPFM TUTORIAL 5 – HOUSEHOLD PART I: create a household, share and read the Household

SMARTPFM TUTORIAL 5 – HOUSEHOLD PART I: create a household, share and read the Household

Create a household, invite your spouse, choose what each person shares (Nothing, Totals, Full view, Custom view) and read the household overview.

Watch · 10:04 min
SMARTPFM TUTORIAL 6 – HOUSEHOLD PART II: the household budget

SMARTPFM TUTORIAL 6 – HOUSEHOLD PART II: the household budget

Start a budget your household plans and records together: contributions, roles (owner, planner, member), paying a bill from your own pocket, who has paid what, and assigning items.

Watch · 11:43 min
SMARTPFM TUTORIAL 7 – HOUSEHOLD PART III: the household's net worth

SMARTPFM TUTORIAL 7 – HOUSEHOLD PART III: the household's net worth

Start a net worth the household owns as itself – the family home, a joint fund, the family car and its loan. Roles, valuations by any member, moving items in and out, and household reports.

Watch · 11:43 min
SMARTPFM TUTORIAL 8 – Account Security – Keep Your Account and Records Safe

SMARTPFM TUTORIAL 8 – Account Security – Keep Your Account and Records Safe

Switch on two-step sign-in and save your recovery codes, lock and hide amounts on each device, hide account numbers in reports, control who sees your records, and export or close your data.

Watch · 14:07 min
Start here · 15 minutes

Quick setup

  1. Create your account at the sign-up page, accept the Terms and confirm your email. Premium is free for 90 days.
  2. Answer the welcome questions – what you own and owe today, then your monthly income and expenses. Rough figures are fine; tick Skip this one on anything you don't want, or Skip setup to leave without saving anything.
  3. Add your assets and loans first (SACCO, MMF, bank, land, car; car loan, HELB). The budget can then link to them.
  4. Add your income and expense settings – salary, rent, school fees, utilities – with the paybill or account in the notes.
  5. Review and start this month's budget – the last step of the welcome questions shows it, with Start this month's budget ticked – and record what has already come in and gone out.
  6. Install the app on your phone and turn on two-step sign-in.

Tip: do the net-worth side first. It takes ten minutes, gives you your number today, and makes the budget links possible.

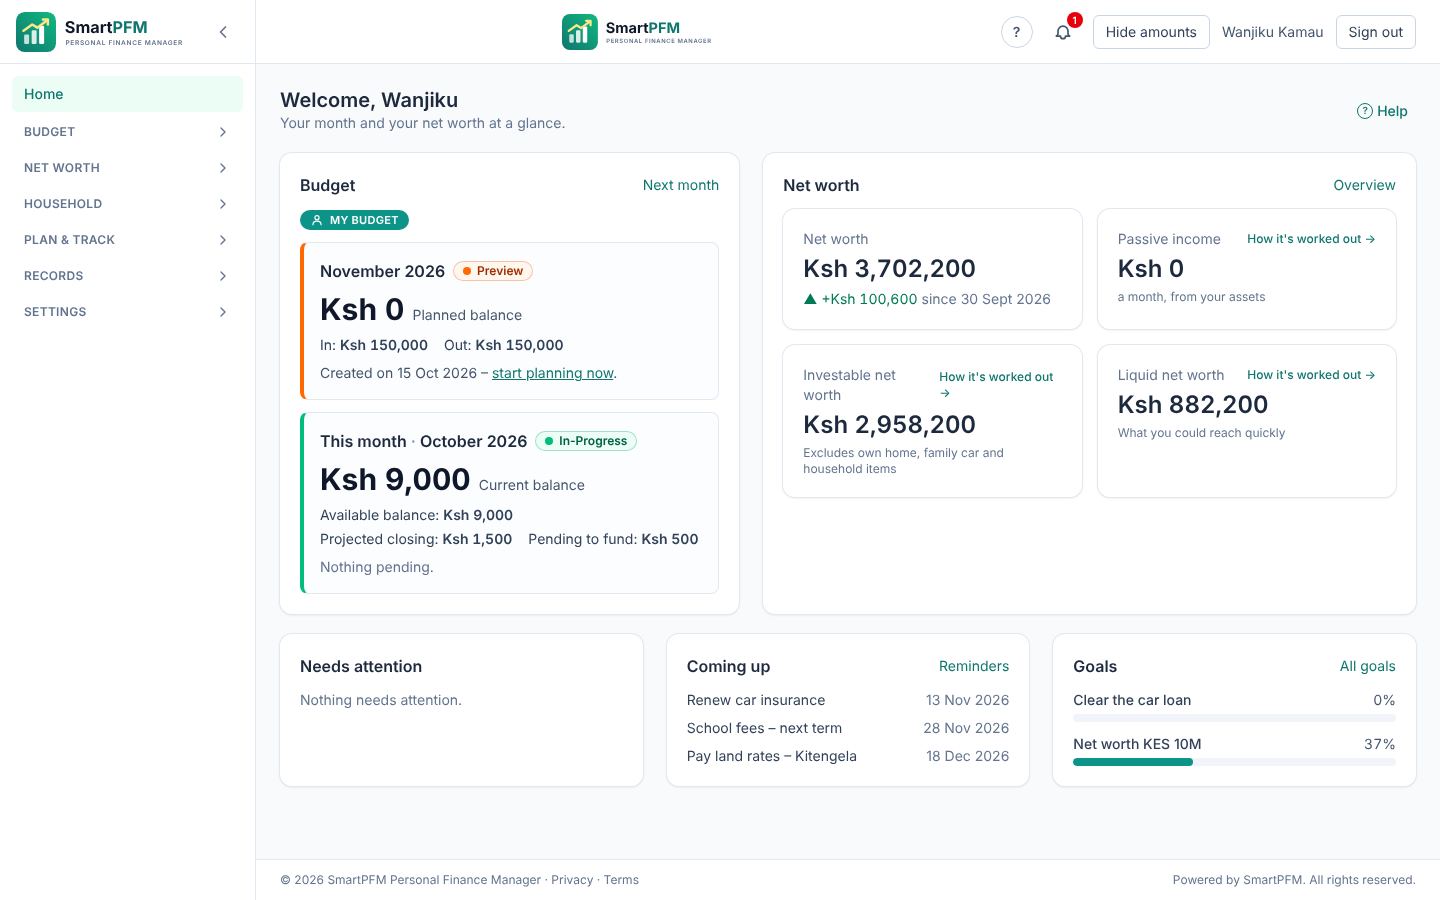
The home screen: this month's budget, net worth and goals at a glance
Net worth · Assets

Add what you own

  1. Go to Net worth → Assets → Add asset and pick a category: bank, SACCO, MMF, shares, land, vehicle, pension, chama…
  2. Enter today's value (or units × price for shares and unit trusts) and the date.
  3. Mark your own home and family car so they're left out of investable net worth, and set your share if you co-own it.
  4. Update the value whenever you get a statement; SmartPFM reminds you when a value is getting old.

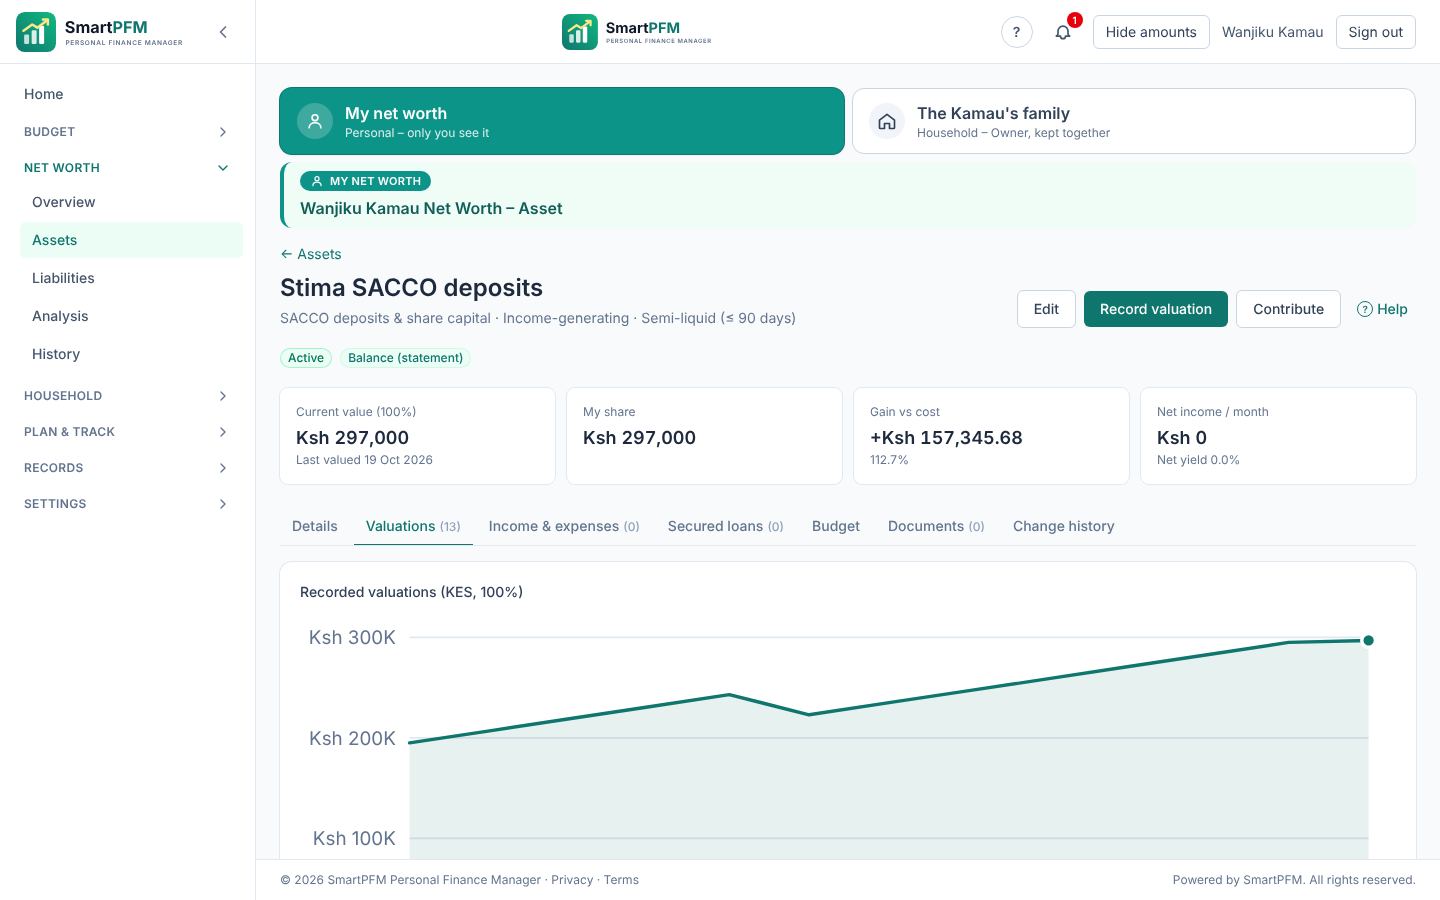
Example: a SACCO with Ksh 180,000 in deposits → category SACCO deposits, value 180,000. Add Ksh 15,000 each month from the budget (see Linking) and the April dividend as a valuation.

A SACCO asset's valuations over time
Net worth · Liabilities

Add what you owe

  1. Net worth → Liabilities → Add liability: mortgage, car loan, SACCO loan, HELB, mobile loan, credit card…
  2. Enter the original amount, the balance today, the rate and the instalment. SmartPFM builds the schedule and the payoff date.
  3. Record payments as they happen – or let the budget record them for you.
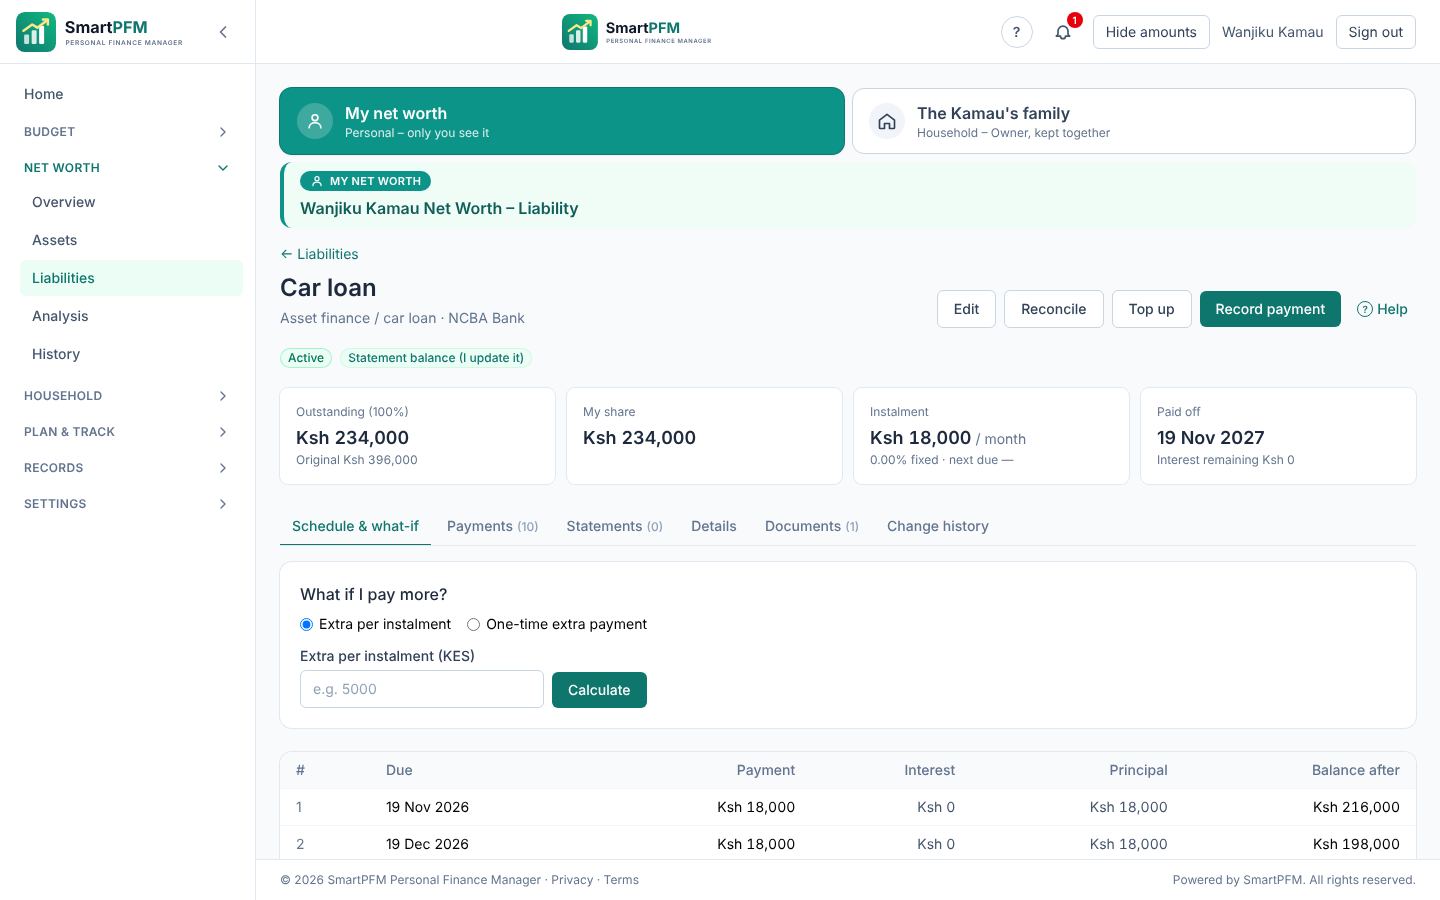
  4. Open Schedule & what-if to see what paying extra would save.

Example: a Ksh 900,000 car loan at Ksh 25,000 a month. Set the instalment, link the budget's Car loan expense, and every month the balance drops without you touching the loan.

A loan's schedule and what-if
Budget · Settings

Describe your regular money once

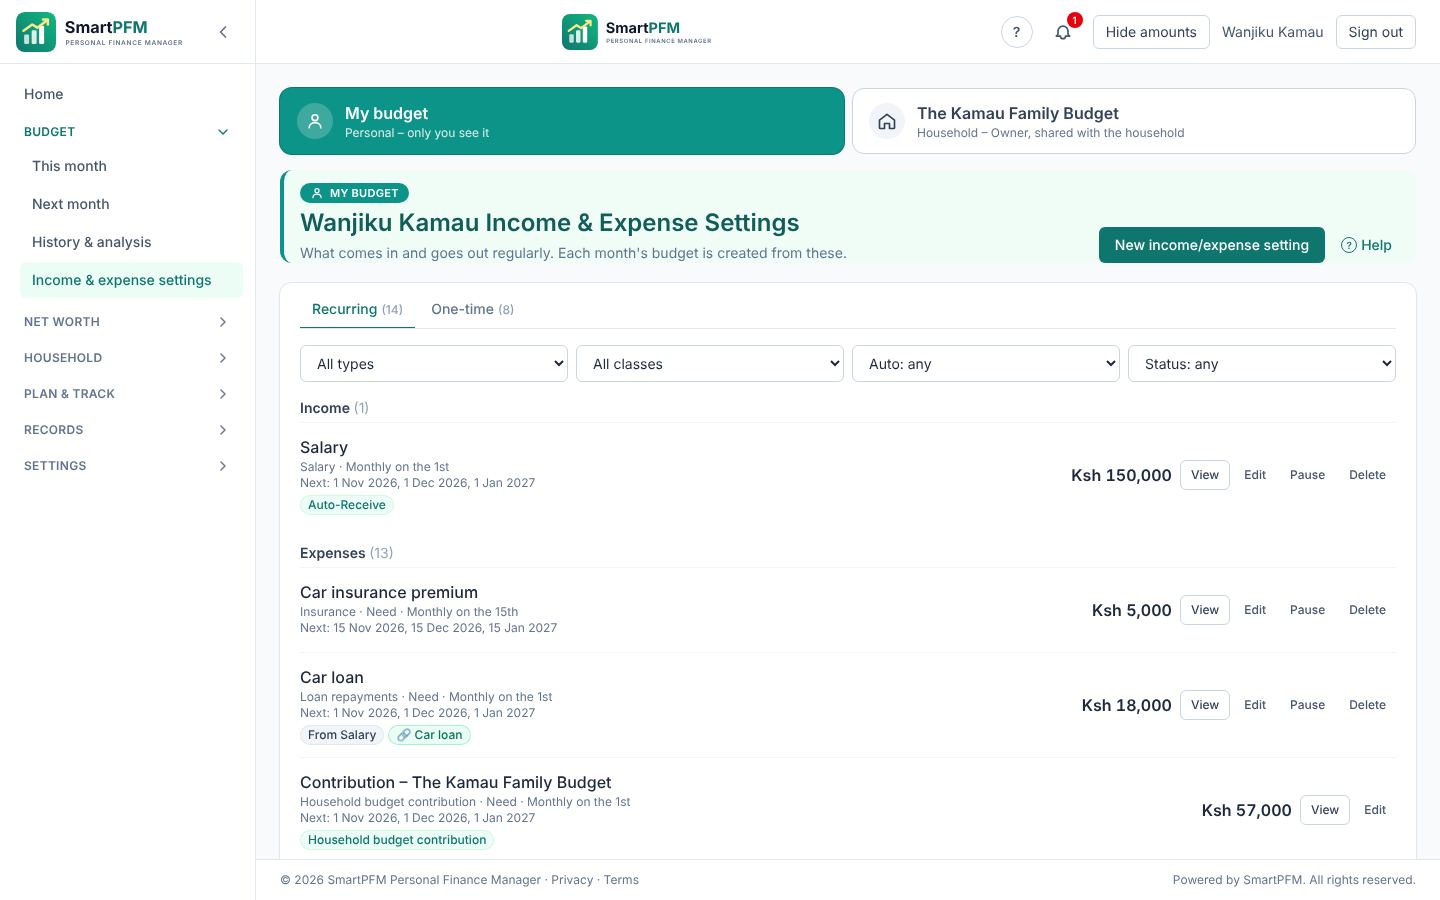
  1. Budget → Income & expense settings → New income/expense setting.
  2. Choose income or expense. If it belongs to an asset or loan – rent from a flat, a loan repayment, money from your MMF – link it first: its amount and dates are filled in for you.
  3. Choose the category (an expense is a need, a want or savings) and the amount.
  4. Set how it repeats: monthly, quarterly, termly, twice a year, yearly, on chosen dates, or once.
  5. Turn on Auto-Receive / Auto-Spend for money that moves on its own (salary, standing orders).
  6. For an expense, choose where the money comes from: the pool of available money, or a specific income.
  7. Put payment details in Notes – paybill, till, account number – and choose what happens if it isn't paid by month-end.

Example: Electricity (KPLC) – expense, need, Ksh 4,500 monthly on the 5th, notes "Paybill 888880, account 1234567". School fees – Ksh 30,000 on the 20th, the unpaid remainder deferred to next month.

Income and expense settings with recurring items and filters
Budget · This month

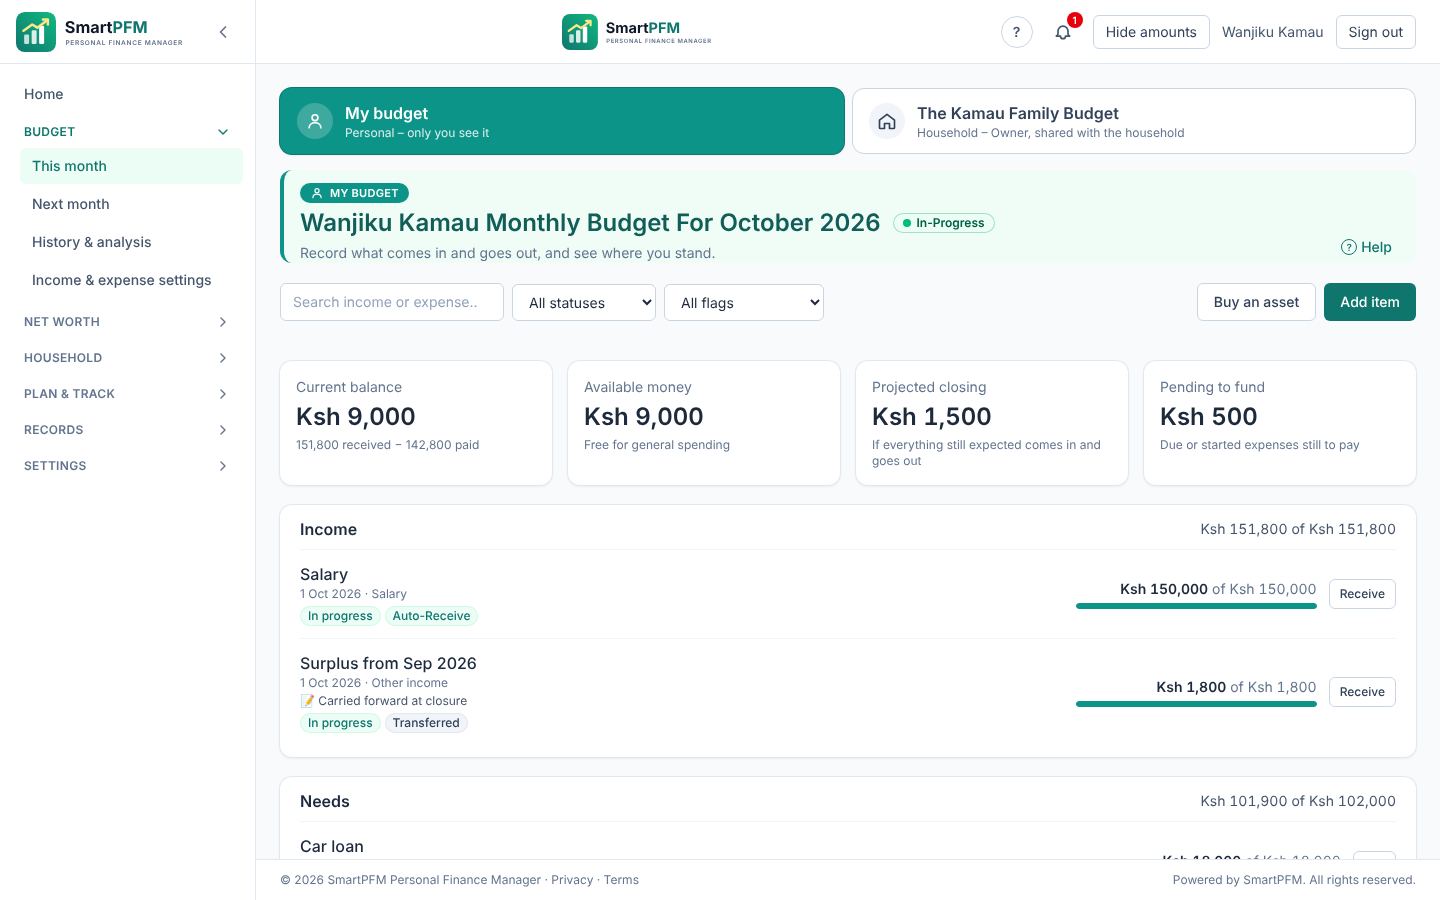
Live the month

  1. Next month's budget is created on the 15th from your settings. Check it under Next month, change anything, and it starts on the 1st.
  2. As money moves, tap Receive or Pay. Part-payments are fine.
  3. Something unplanned? Add item and mark it as an emergency if it was one.
  4. Watch Available money (free to spend) and Projected closing (where the month will end).

Example: the salary of Ksh 185,000 is received on the 1st by Auto-Receive; the car loan goes out the same day by Auto-Spend. On the 20th you pay school fees from your phone, with the bank details from the notes in front of you.

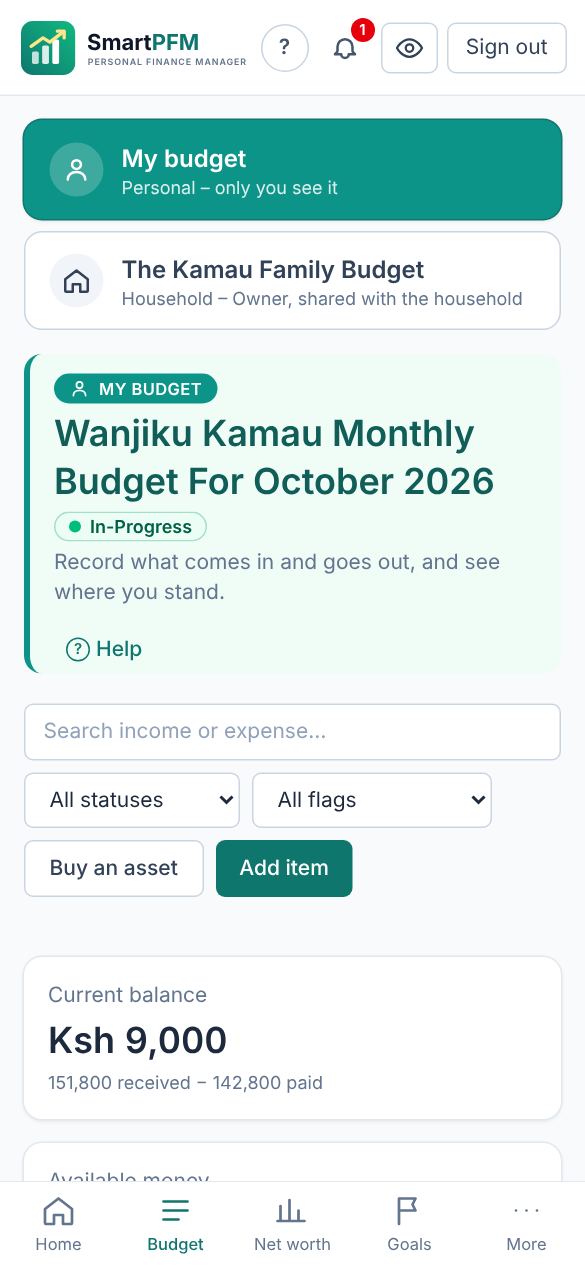
This month on a phone
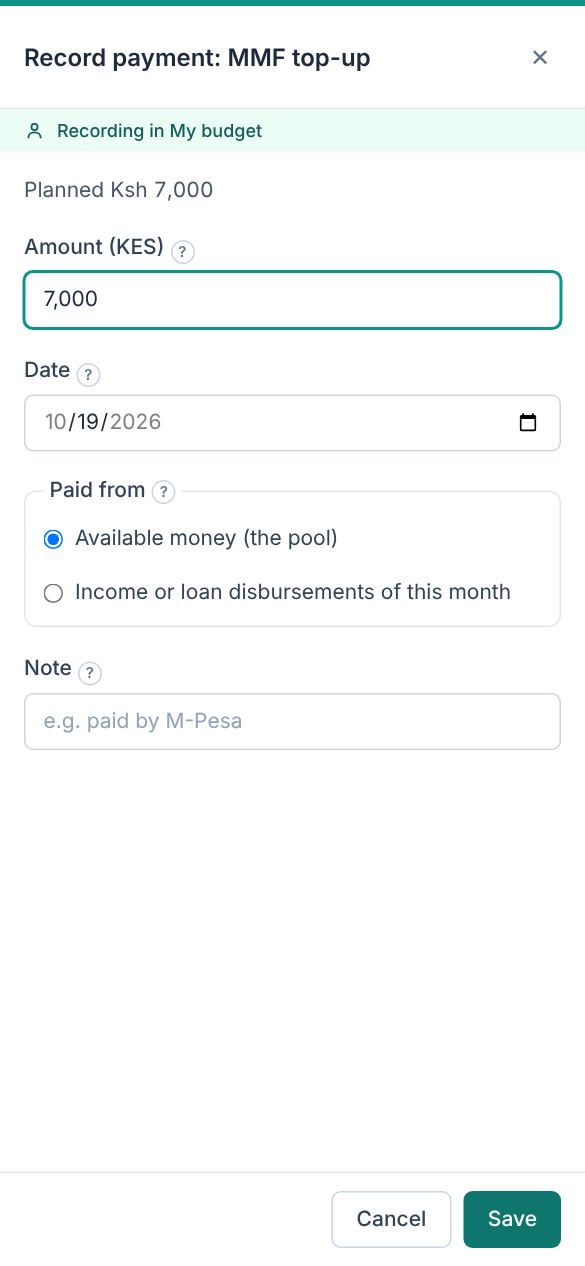
Recording a payment on a phone
Budget ↔ net worth

Link payments to loans and savings

  1. In an expense setting, under Linked asset or loan, choose the loan it repays or the asset it adds to.
  2. From then on, paying the item records the loan payment or the contribution – once.
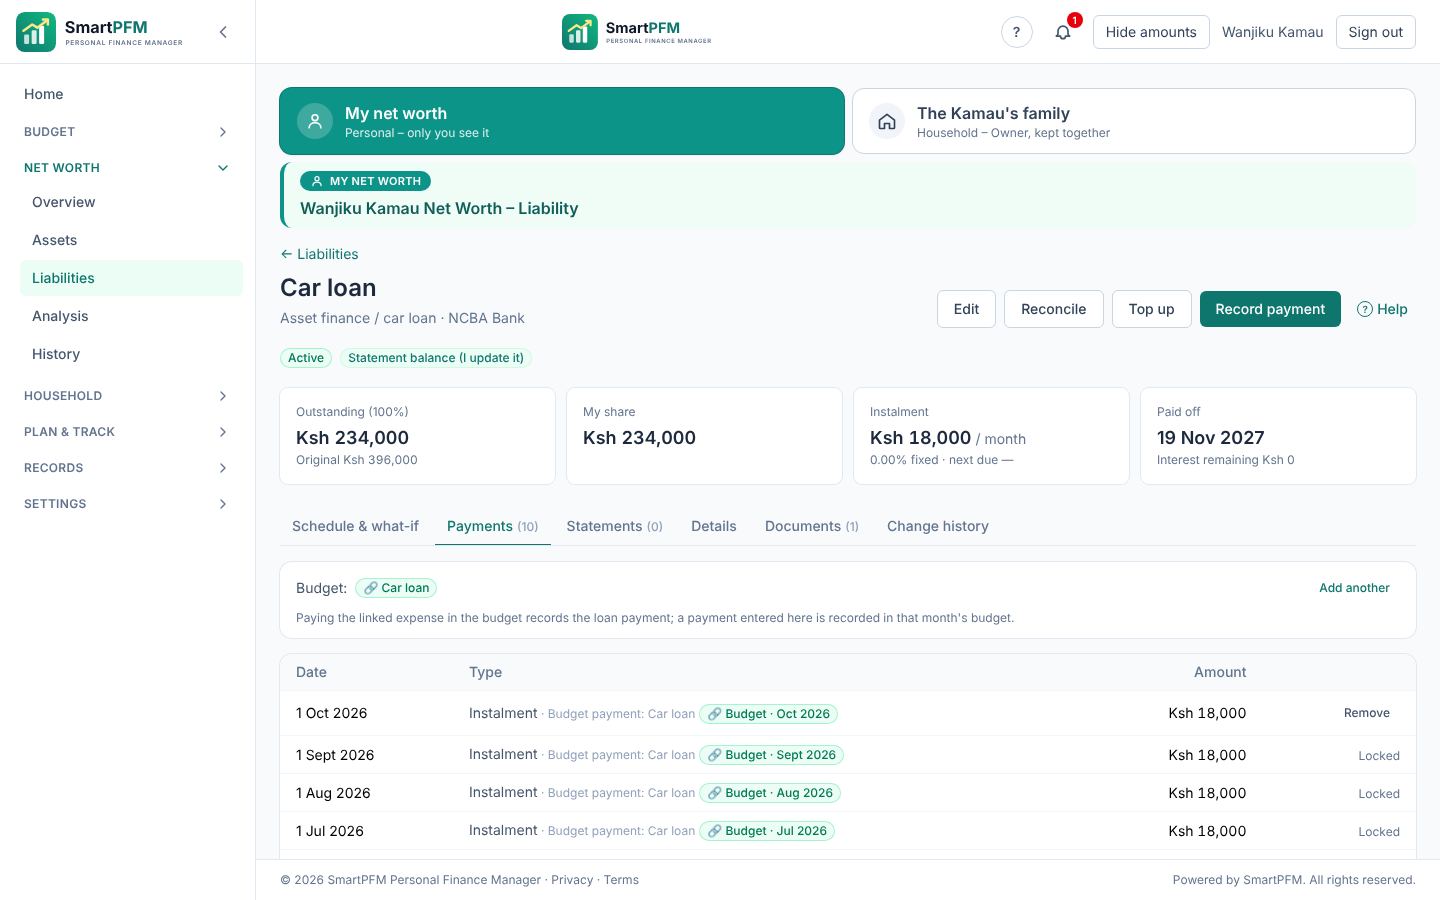
  3. The loan or asset shows the payment with the budget month that made it.

Example: SACCO deposit Ksh 15,000 linked to your SACCO asset; Car loan Ksh 25,000 linked to the loan. One month later: the SACCO is up 15,000, the loan down 25,000, and your net worth shows both.

A loan's payments, each tagged with its budget month
Budget · Buying an asset

Buy a plot, a car or a fridge – in full, in instalments or on a loan

  1. On This month, choose Buy an asset.
  2. Pick how you're paying: in full, in instalments, or with a loan – the loan is created with the asset.
  3. If the money comes from savings, say which – it isn't counted as income.

Example: a Ksh 600,000 plot in six instalments of Ksh 100,000. Each instalment is a budget expense; the plot counts at what you've paid until the last one.

Budget items: needs, wants and savings
Budget · Review & close

Close the month, learn from it

  1. The month closes on the 3rd of the next month (or choose Close now). Unpaid items follow their deferral rule; the surplus can carry forward.
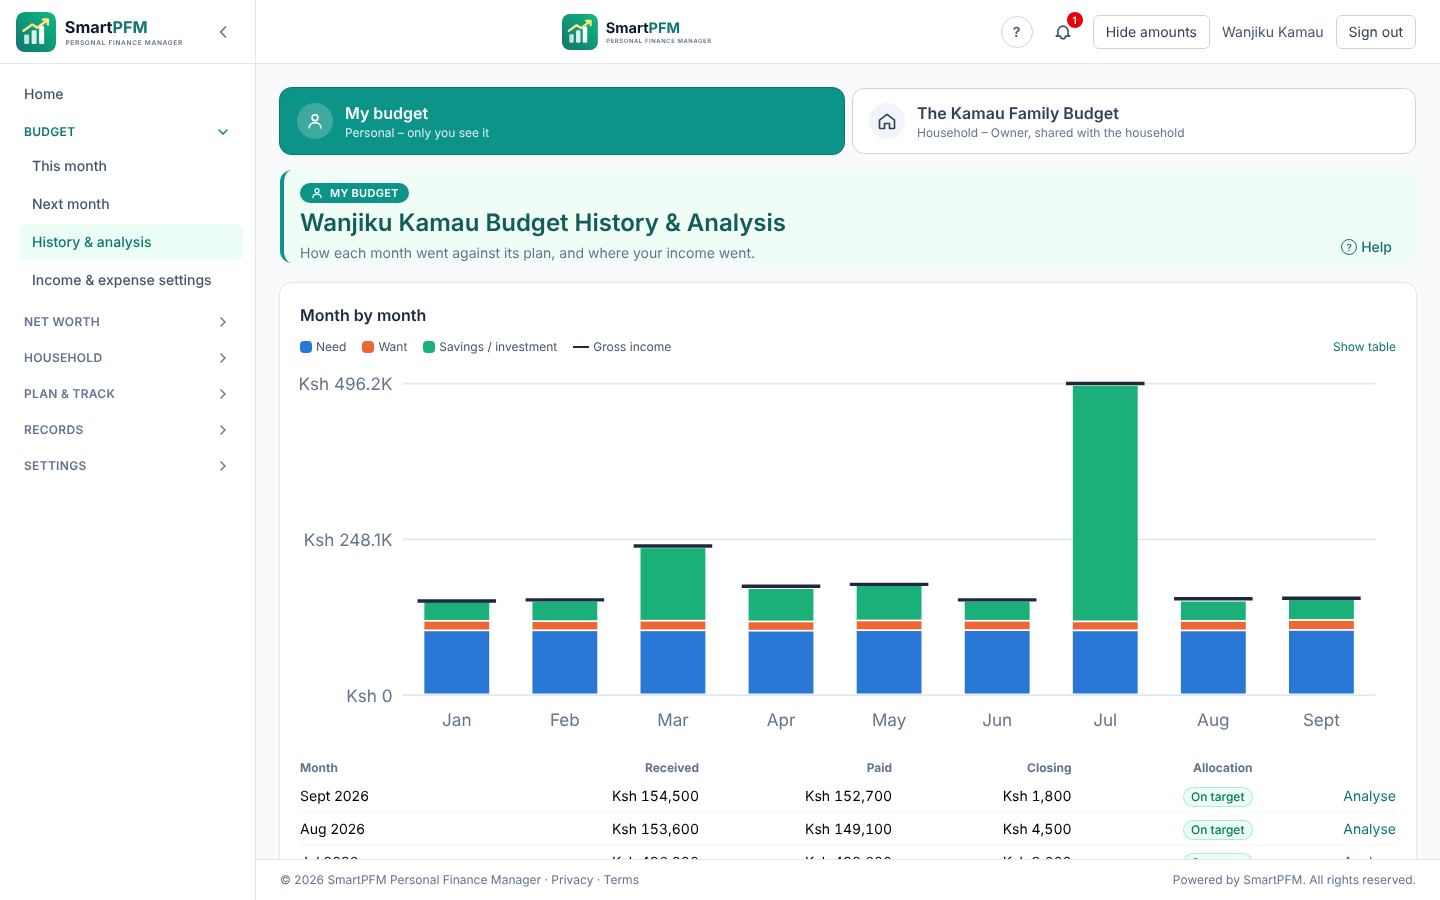
  2. History & analysis shows each month against its plan, the needs / wants / savings split and where each income went.
  3. Open the statement on screen, or download it as PDF or Excel.
  4. Adjust next month's settings – that's the "improve" in plan, do, review, improve.
History and analysis with three closed months
Plan & track · Goals

Set a goal and let it track itself

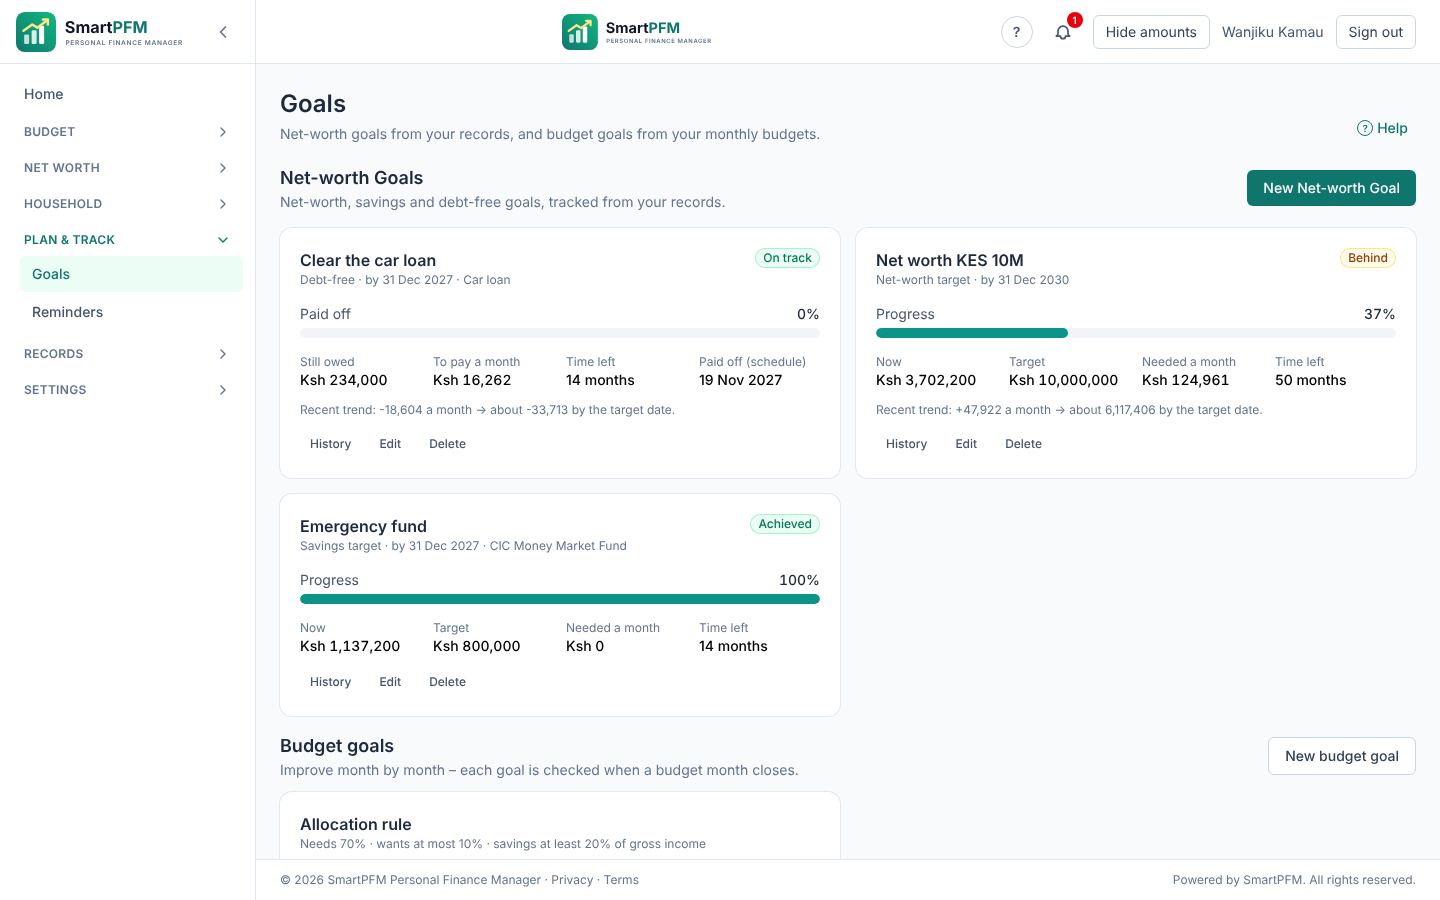
  1. Plan & track → Goals → New Net-worth Goal: savings, debt-free or net worth.
  2. Choose the assets or loans it follows, a target and a date.
  3. Progress is recorded at every month-end. Budget goals – save more, spend less on wants, cap a category – sit on the same page.

Example: Emergency fund – Ksh 800,000 in your MMF by December 2027. Each month's top-up moves the bar.

Goals with progress
Plan & track · Reminders

Never miss a date

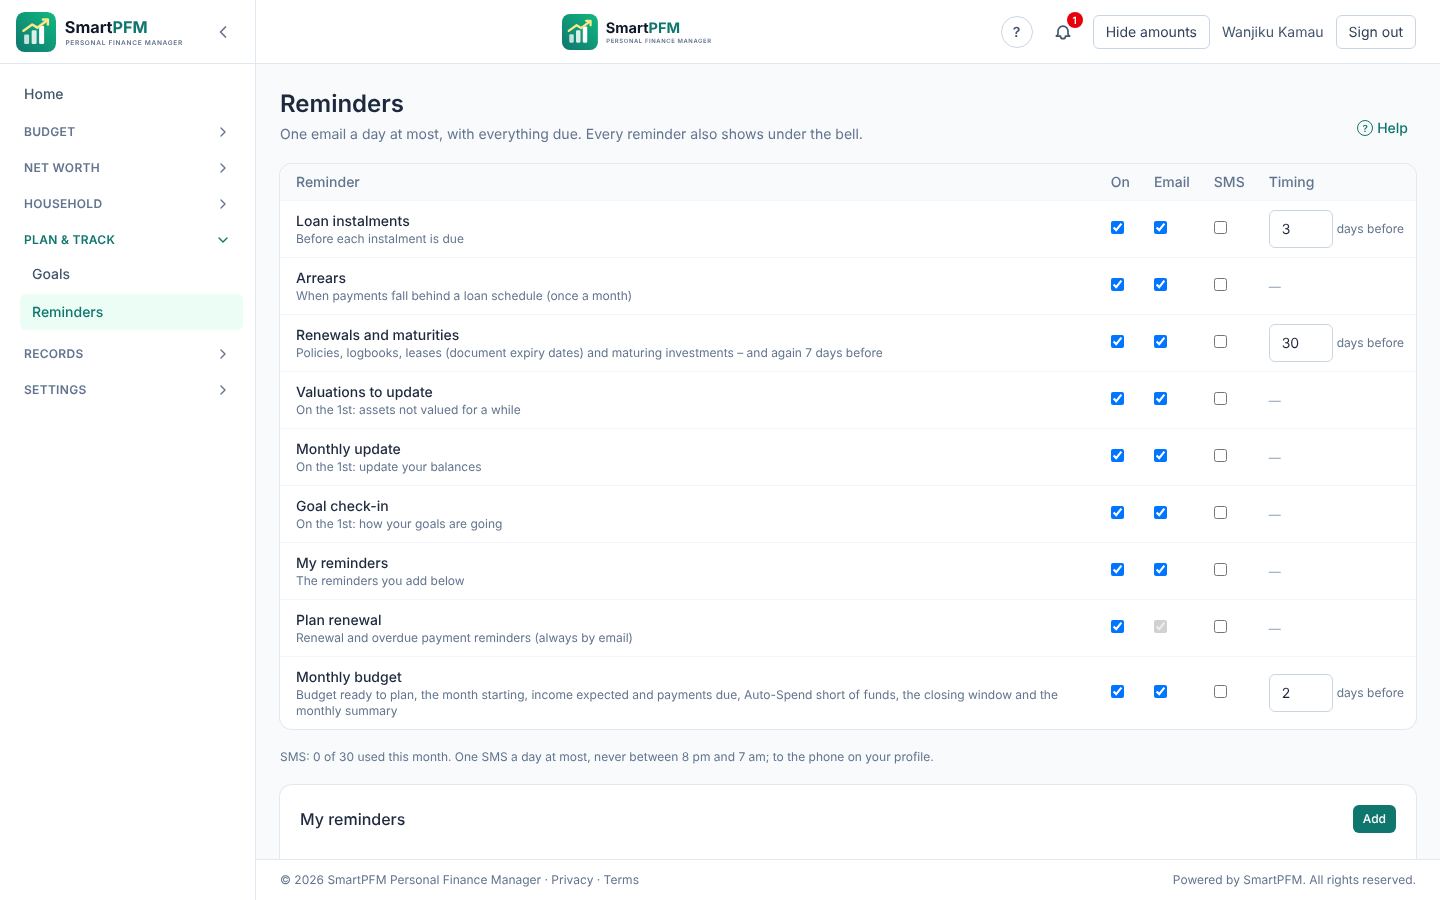
  1. Loan instalments, renewals, maturities and document expiry dates remind you automatically.
  2. Under Reminders, choose for each type: in the app, by email or by SMS, and how many days before.
  3. Add your own: a land-rates payment, a chama meeting, a KRA return by 30 June.
Reminder settings: loan instalments, renewals and valuations, in the app, by email or SMS
Records · Documents

Put your papers in the vault

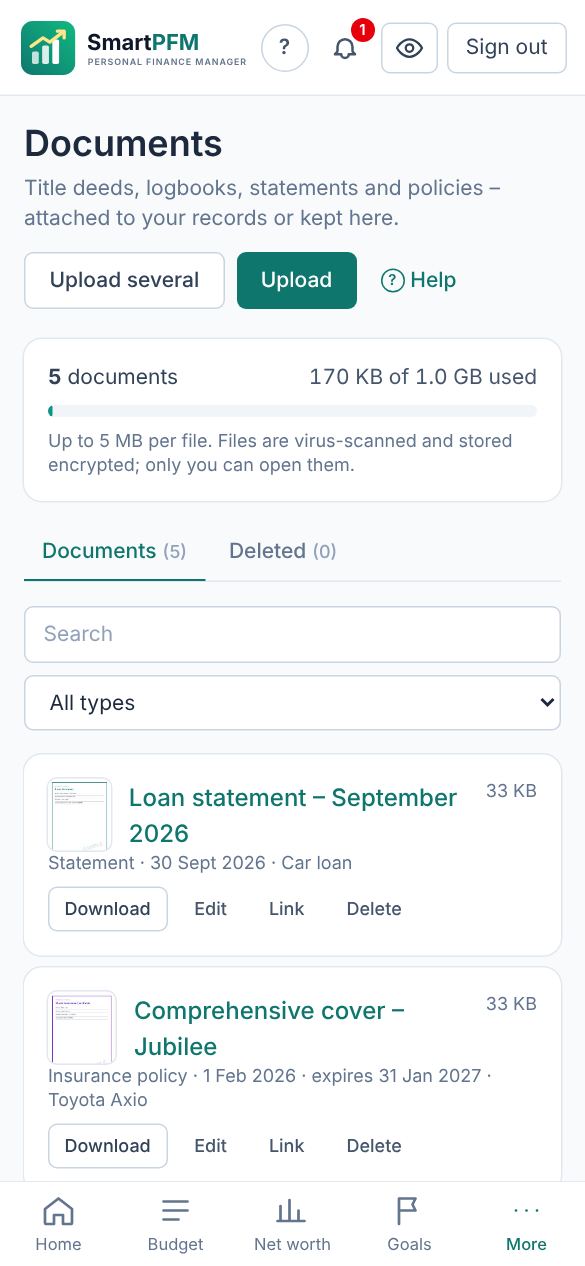
  1. Records → Documents → Upload (or Take a photo on a phone).
  2. Choose the type – title deed, logbook, policy, statement, receipt – and attach it to its asset or loan.
  3. Add an expiry date to get a reminder before it runs out.
  4. Each document shows a small preview – the photo, or a PDF's first page – in every list.
  5. Many papers? Upload several saves them all (titled by file name); edit the details afterwards.
  6. Need it on another record too? Link it to another asset, loan or budget item – it is stored once.

Example: photograph your car's insurance certificate, attach it to the car, expiry 31 January – you're reminded 30 days and 7 days before.

Documents on a phone
Records · Reports

Get a statement in a click

  1. Records → Reports: statement of net worth, asset and liability registers, income from assets, the statement of cash-flow; budget statements are under Budget → History & analysis.
  2. View on screen, or download as PDF (optionally with a password) or Excel. Tick Hide account numbers when the report is for someone else.
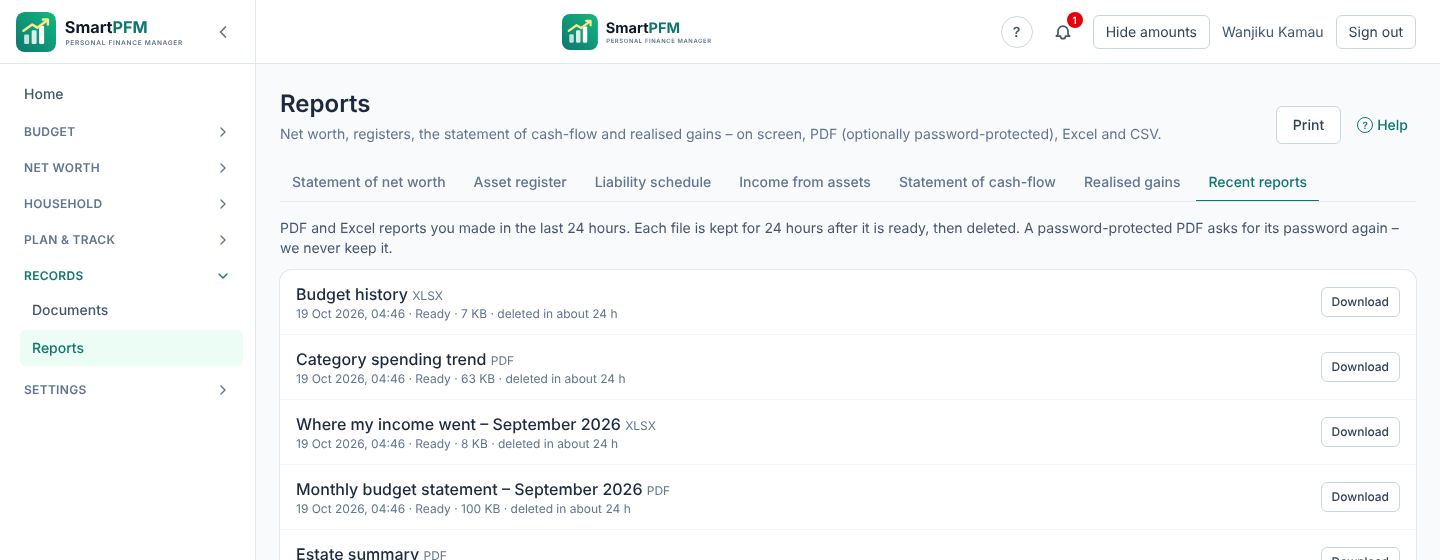
  3. A big report is prepared in the background: find it, and anything you made in the last 24 hours, under Recent reports.
  4. Need everything? Profile → My data & privacy → Download all my data.

Example: the SACCO wants your statement of net worth for a loan. Download the PDF with Hide account numbers ticked – the SACCO sees where each account is held, not its number.

Recent reports: an estate summary, a statement of cash-flow and a statement of net worth, ready to download again
Household · Estate & legacy

Leave your family a map, not a puzzle

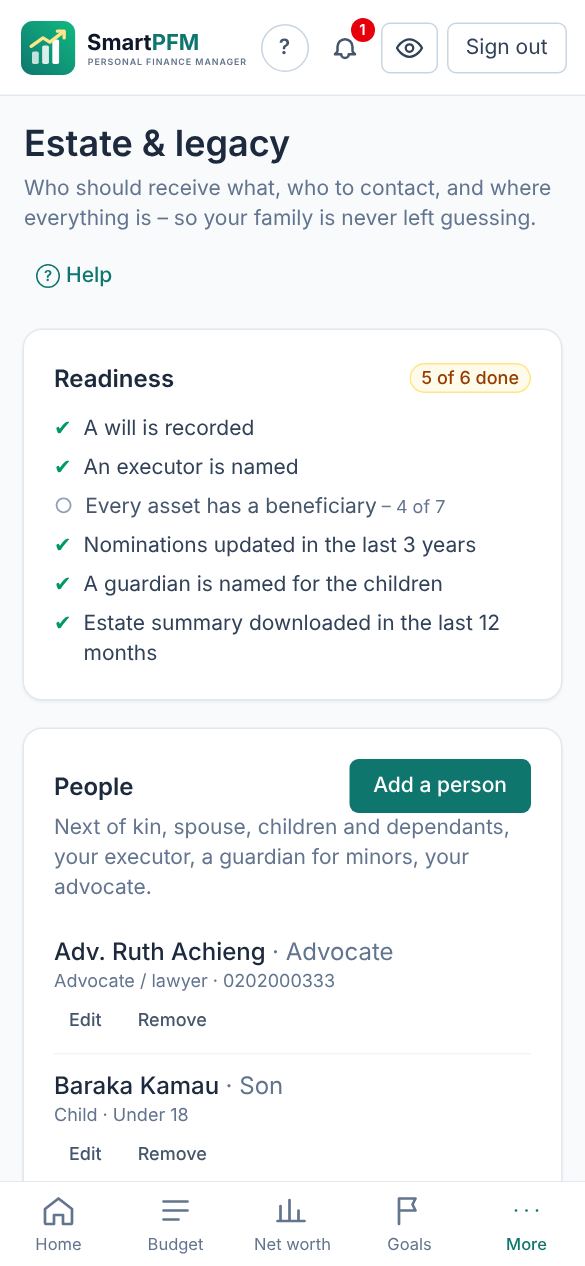
  1. Household → Estate & legacy → Add a person: your spouse and next of kin, children (tick Under 18), your executor, a guardian and your advocate.
  2. Under Will & wishes, record whether you have a will, where the original is and who the executor is. Add a letter of wishes if you like.
  3. For each asset, choose who receives it (shares adding up to 100 %), whether it is by my will or nominated with the institution, and where the documents are.
  4. Work through the Readiness checklist, then download the estate summary for your family or executor.

Example: the SACCO deposits are nominated to your husband (form updated 2024), the plot in Kitengela goes to your two children 50/50 by your will, and the title deed is in the bank's safe deposit box – all on one page of the estate summary.

Estate & legacy on a phone
Household · My Household

See the family picture together

  1. Household → My Household: name the household and choose Create (Premium). You become its owner.
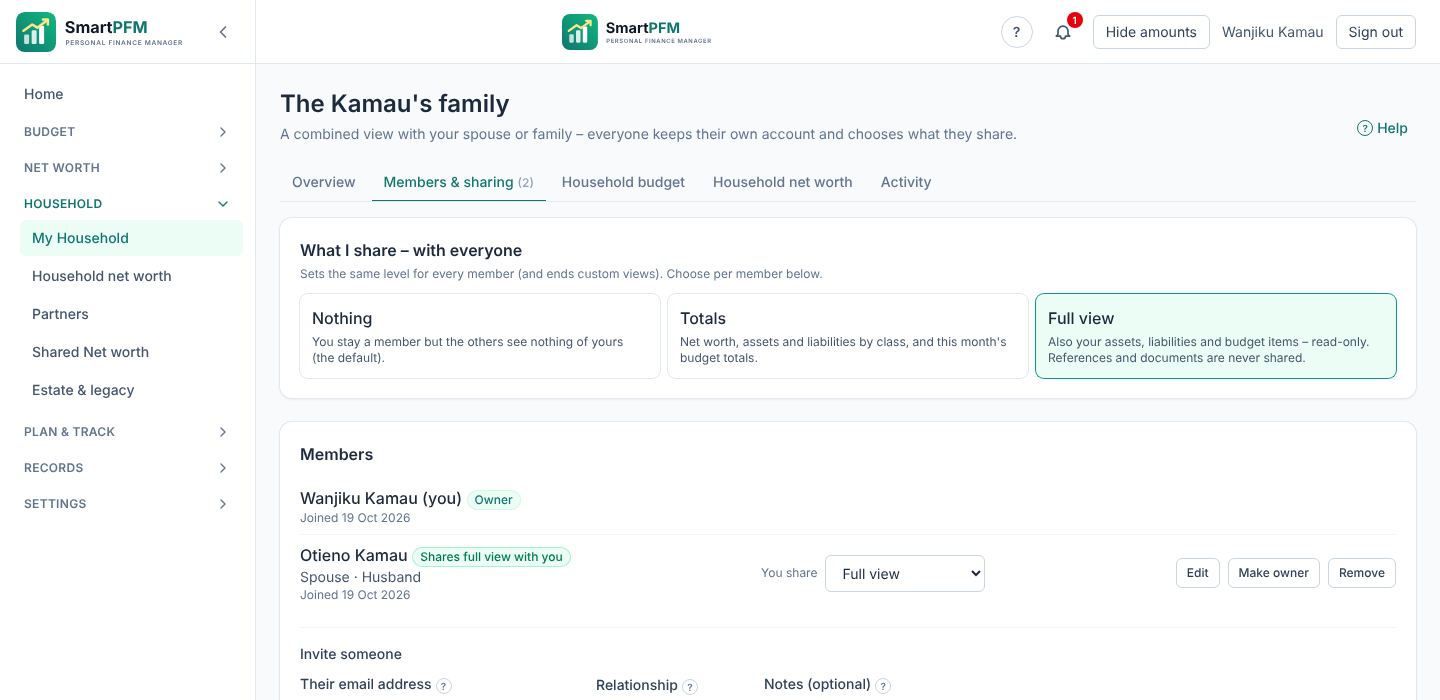
  2. Under Members & sharing, invite your spouse by the email address they use for SmartPFM – with their relationship (Spouse unless you choose another) and an optional note. They sign in (or sign up – any plan, Free included), open Household and accept.
  3. Each of you chooses What I share – with everyone, or per member under You share: nothing (where everyone starts), totals, a full read-only view, or a custom view (Premium: the items you tick, for 1–30 days, with a preview first). Change it whenever you like.
  4. Things the household owns as itself (the family home, a joint fund, a car)? The owner starts Household → Household net worth (Premium); then switch between My net worth and the household's on the Net worth pages. Owner and planners add items, every member can add a valuation, and Move to the household brings one of yours in.
  5. Own something with others? Set My ownership % on the asset (or My share % on a loan), then open Household → Shared Net worth and choose Edit to say who owns the rest – a household member or a Partner (Household → Partners, Premium: up to 5 people who need no account). Invite sends the item's name, category and their share – no amounts; they can add it to their own net worth or merge it with one they have.
  6. On the Overview, fix anything Possibly counted twice: set each share (e.g. 50 %) or choose Same as – count once.

Example: Wanjiku and Otieno both recorded the Kitengela plot at 100 %. The household view flags it; they set 50 % each and the household net worth counts the plot once.

Members and sharing: what I share – nothing, totals or a full view – and the household's members
Budget · Household budget

Run the family's shared budget

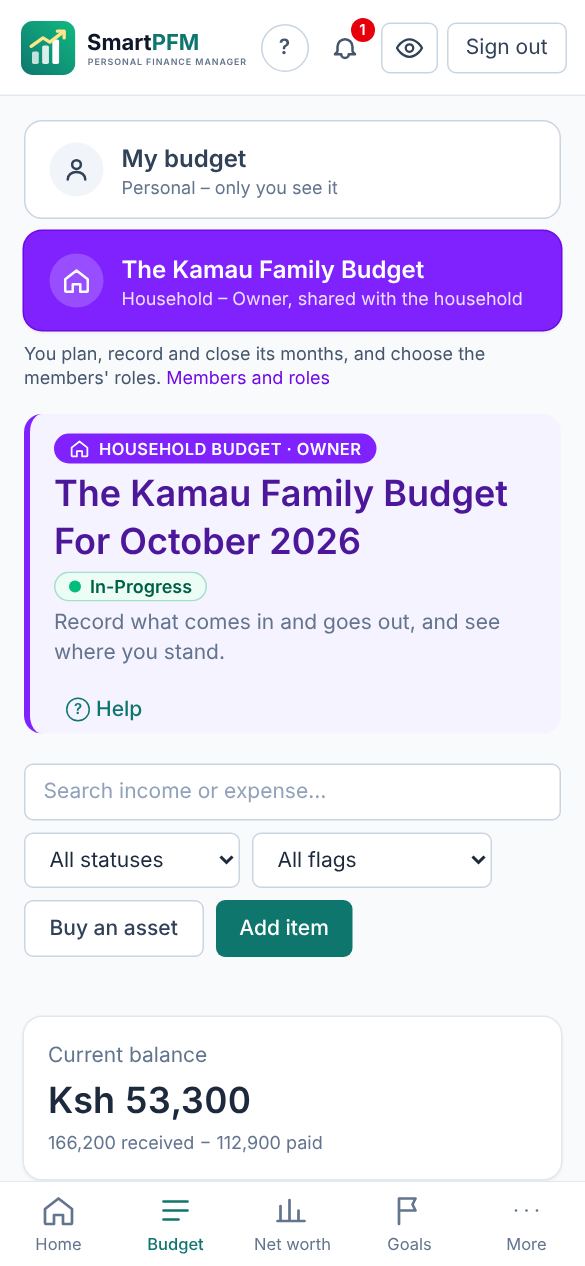
  1. Household → Household budget: the owner names it (The Kamau Family Budget) and starts it (Premium). Choose who is a planner; everyone else is a member.
  2. Each member chooses Add my contribution: the amount, the day and notes – e.g. Deposit to the joint account – Equity …. It appears in their own budget as an expense and in the household budget as income.
  3. On any Budget page, switch to the household budget. Planners add the shared bills (rent, food, school fees, the househelp) and can assign each to a member – that member gets its reminders.
  4. Record payments as they happen. Paid a bill with your own money? Tick Paid from my own pocket – it is recorded once in both budgets.
  5. Check Who has paid what at the bottom of This month.

Example: Wanjiku puts in 70,000 and Otieno 80,000 on the 1st, both to the joint Equity account. Otieno pays the rent; Wanjiku looks after the school fees; Otieno pays the home internet from his own pocket – and it shows as his.

The Kamau Family Budget on a phone: My budget or the household's, and this month's balance
Phone and computer

Install the app

  1. Android (Chrome, Edge, Samsung Internet): sign in, then tap Install SmartPFM on Home – or the browser menu ⋮ → Install app.
  2. iPhone / iPad (Safari): tap Share → Add to Home Screen.
  3. Computer (Chrome, Edge): the install icon in the address bar.

The app opens full-screen with its own icon. Long-press the icon for shortcuts to the budget, net worth and documents.

Home on a phone
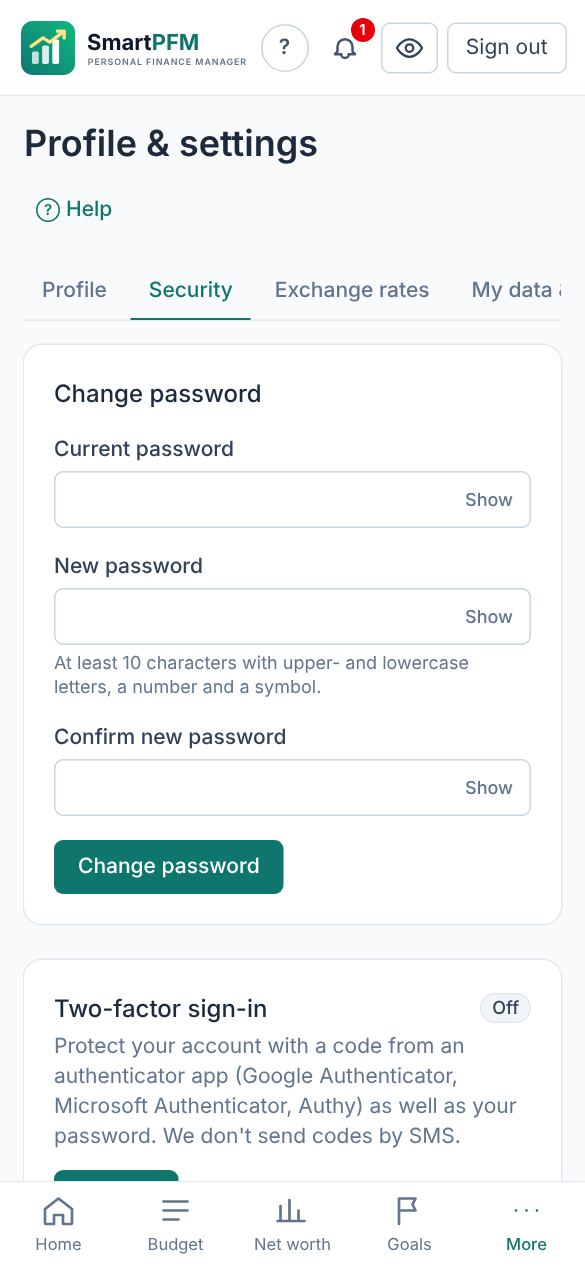
Security settings on a phone
Settings · Security

Lock it down in two minutes

  1. Profile → Security → Two-step sign-in: scan the code with an authenticator app and save the recovery codes somewhere safe.
  2. Set Auto-lock on your phone, and use Hide amounts in public.
  3. Lost a phone? Sign out everywhere ends every session at once; changing your password does the same.
Security settings
Settings · Plan & billing

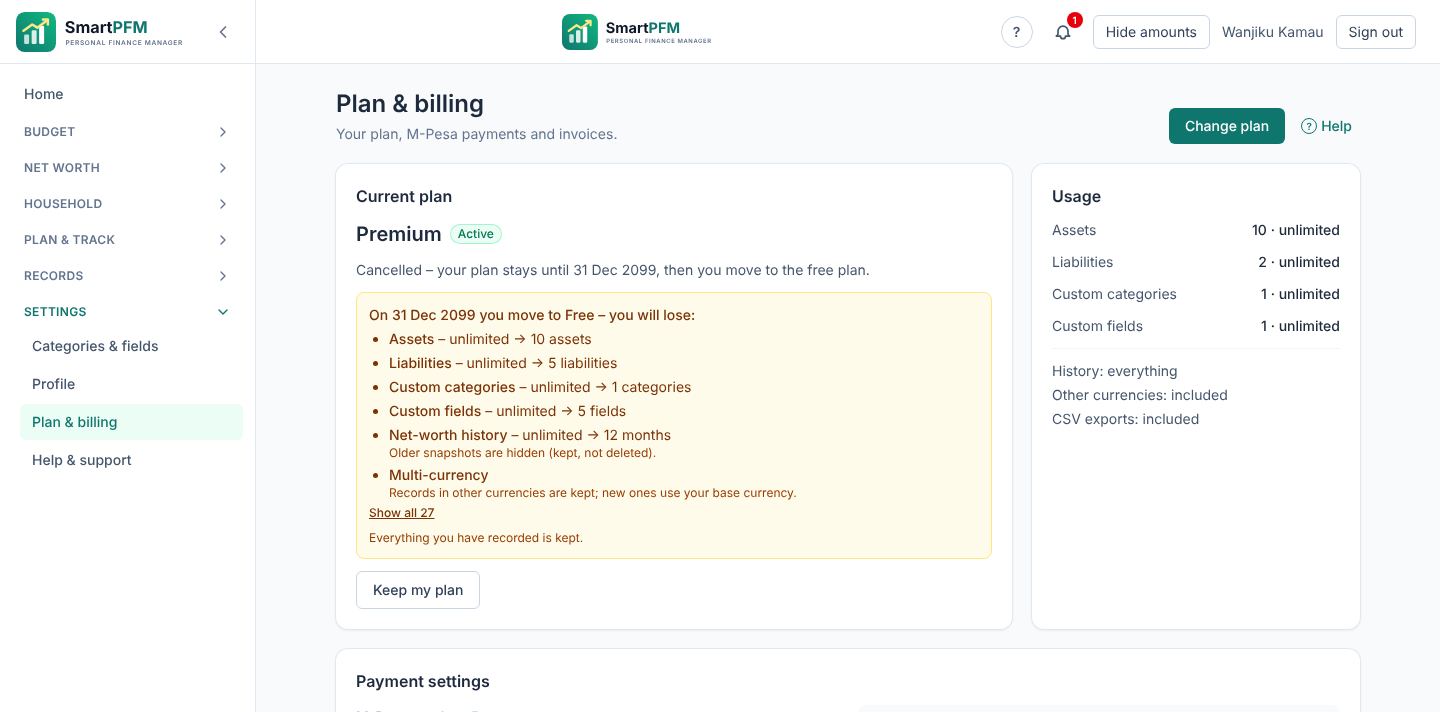
Choose a plan and pay with M-Pesa

  1. Your 90-day Premium trial needs no payment. You're reminded 14, 3 and 1 days before it ends.
  2. Settings → Plan & billing: compare plans, choose monthly or yearly.
  3. Enter your M-Pesa number and approve the prompt on your phone. Your receipt and invoice appear at once.
  4. Before any move to a smaller plan, SmartPFM shows exactly what you'd lose – nothing is deleted without you knowing.
See plans and prices
Plan and billing: the current plan, the trial and the plans to choose from

Ready? Your first net worth is ten minutes away.